Welcome to the world of easy bread-making with the Welbilt Bread Machine! This user-friendly appliance simplifies baking, offering versatility for various bread types and sizes․
With its advanced features and straightforward controls, it’s perfect for both beginners and experienced bakers․
Get ready to enjoy freshly baked bread with minimal effort by following these essential instructions․

1․1 Overview of the Welbilt Bread Machine
The Welbilt Bread Machine is a versatile and efficient appliance designed to simplify bread-making at home․ Available in various models such as the ABM100-4, ABM3100, and ABM4100T, it offers features like delay start, programmable settings, and automatic dough preparation․
These machines cater to different loaf sizes, from 1 lb․ to 2 lbs․, and include options for light or dark crust preferences;
With a user-friendly control panel and durable construction, the Welbilt Bread Machine is ideal for both novice and experienced bakers․
Its compact design and advanced features make it a practical addition to any kitchen, ensuring fresh, homemade bread with minimal effort․
Refer to the instruction manual for specific model details and operation guidelines․
1․2 Importance of Following the Instruction Manual
Following the instruction manual for your Welbilt Bread Machine is crucial for safe and effective operation․ The manual provides detailed guidance on loading ingredients, selecting programs, and maintaining the machine․
It highlights essential safety precautions, such as avoiding direct ingredient pouring into the machine and proper placement of the baking pan․
The manual also explains advanced features like delay start and crust color settings, ensuring optimal bread quality․
Ignoring the instructions can lead to errors, such as undercooked or overcooked bread, or even machine damage․
Referencing the manual regularly helps troubleshoot common issues and prolongs the machine’s lifespan․
For models like the ABM100-4 or ABM4100T, the manual is your key to unlocking the machine’s full potential and baking perfect loaves every time․

Safety Precautions
Always follow safety guidelines when using the Welbilt Bread Machine․ Avoid pouring ingredients directly into the machine—use the baking pan only․ Ensure the pan is properly placed before operation․
Never operate the machine near water or in humid environments․ Keep it away from children and hot surfaces․ Allow the machine to cool before cleaning or making another loaf․
2․1 General Safety Guidelines
For safe operation, always follow these guidelines: Ensure the Welbilt Bread Machine is placed on a stable, heat-resistant surface away from water sources․ Avoid overloading the machine, as this can cause malfunction․ Never insert utensils or hands into the machine during operation․ Keep children away while baking․ Do not leave the machine unattended․ Ensure proper ventilation in the kitchen․ Always unplug the machine before cleaning or maintenance․ Never operate the machine if it is damaged or malfunctioning․ Regularly inspect the power cord and plug for wear․ Allow the machine to cool down completely before cleaning or making another loaf․ Follow these precautions to ensure safe and efficient use of your Welbilt Bread Machine․
2․2 Specific Precautions for Handling the Machine
When handling the Welbilt Bread Machine, always avoid pouring ingredients directly into the machine—use the baking pan provided․ Ensure the pan is securely placed inside the machine before starting․ Never insert utensils or hands into the machine while it is operating․ Avoid touching the machine’s hot surfaces during or after baking․ Keep the machine away from flammable materials and ensure proper ventilation․ Do not operate the machine if it is damaged or malfunctioning․ Regularly inspect the power cord and plug for wear․ Always unplug the machine before cleaning or maintenance․ Allow the machine to cool down completely before handling or cleaning․ These precautions ensure safe and efficient operation of your Welbilt Bread Machine․

Understanding the Components of the Welbilt Bread Machine
The Welbilt Bread Machine features a control panel for easy operation, a durable baking pan, and essential accessories․ These components work together to ensure efficient bread-making․
Understanding each part is key to optimal performance and troubleshooting․
3․1 Control Panel Features
The Welbilt Bread Machine’s control panel is designed for intuitive operation, offering a range of settings to customize your bread-making experience․
Key features include a SELECT button to choose between various bread programs and a START button to initiate the baking process․
The control panel also includes a TIMER key for delayed baking, allowing you to set the machine up to 13 hours in advance․
Additionally, the STOP button enables you to pause or cancel the cycle, while the EJECT button helps in safely removing the baked loaf․
These features ensure precise control over your bread-making process, making it easy to achieve perfect results every time․
3;2 Baking Pan and Accessories
The baking pan is the core component of the Welbilt Bread Machine, designed for optimal bread formation and easy loaf removal․
Always ensure ingredients are added directly to the pan, not the machine, before placing it inside․
The pan is typically non-stick and dishwasher-safe for convenient cleaning․
Additional accessories, such as a measuring cup and spoon, are provided to help measure ingredients accurately․
Regular cleaning of the pan is essential to prevent residue buildup․
For best results, avoid using abrasive cleaners or scourers, as they may damage the non-stick surface․
Proper care of the baking pan and accessories ensures long-lasting performance and consistent baking results․
Initial Setup and Preparation
Before using your Welbilt Bread Machine, unpack and thoroughly clean all parts, especially the baking pan․
Place the machine on a stable, heat-resistant surface in your kitchen․
Ensure proper ventilation and keep it away from flammable materials․
Once set up, your machine is ready for its first use․
4․1 Unpacking and Cleaning Before First Use
When you unpack your Welbilt Bread Machine, carefully inspect all components, including the baking pan and accessories․
Before first use, wash the baking pan, dough paddle, and any removable parts with warm, soapy water․
Rinse thoroughly and dry with a soft cloth to prevent water spots․
Do not immerse the machine’s electrical base in water․
Wipe it with a damp cloth to remove any packaging residue․
Ensure all parts are completely dry before assembling and plugging in the machine․
This step ensures hygiene and prepares your machine for safe, efficient operation․
Refer to your Welbilt manual for model-specific cleaning instructions, such as for models ABM3100 or ABM4100T․
4․2 Placing the Machine in the Kitchen
Position your Welbilt Bread Machine on a stable, flat surface in your kitchen, ensuring it is level to prevent uneven baking․
Keep it away from direct heat sources, such as ovens or stovetops, to avoid overheating․
Place the machine near an electrical outlet to ensure easy access to power․
Allow at least 4-6 inches of clearance around the machine for proper air circulation․
Do not place it near flammable materials or in humid environments․
For models like the ABM3100 or ABM4100T, ensure the location is convenient for adding ingredients and monitoring the baking process․
This setup ensures safe and efficient operation of your Welbilt Bread Machine․

Basic Operating Instructions
Load ingredients into the baking pan, select your desired program, and press START․ For delayed baking, use the TIMER key up to 13 hours in advance․
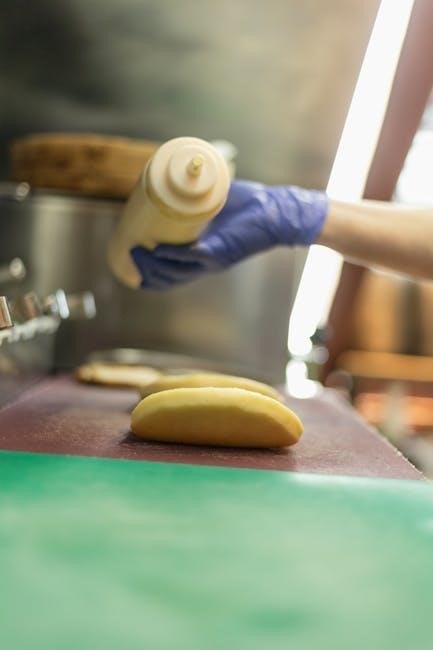
5․1 Loading Ingredients into the Baking Pan
Always place ingredients into the baking pan, never directly into the machine․ Add liquids first, followed by dry ingredients, and yeast last․ Ensure the pan is not overfilled․
Do not pour ingredients directly into the machine—use the baking pan provided․ Place the pan securely into the machine before starting; For best results, follow the ingredient order recommended in your manual․ Some models may specify exact measurements or layering techniques․ Avoid overfilling to prevent spillage during operation․ Refer to your specific model’s instructions for any unique requirements․ Proper loading ensures even mixing and baking․ This step is crucial for achieving the perfect loaf every time․
5․2 Selecting the Right Program for Your Bread
Selecting the correct program is essential for achieving the perfect loaf․ The Welbilt Bread Machine offers various preset programs, such as Basic, Whole Grain, Rapid, and Crust Color settings․ Each program is designed for specific bread types and preferences․ For example, the Basic program is ideal for standard white bread, while Whole Grain handles denser dough․ Use the Crust Color setting to choose between Light, Medium, or Dark crusts․ Refer to your manual for model-specific programs, as some machines may offer additional options like Gluten-Free or Dough settings․ Experiment with different programs to find your perfect loaf․ Proper program selection ensures optimal results, whether you’re making classic bread or specialty varieties․ Always match the program to your recipe for best outcomes․
5․3 Starting the Machine
Once your ingredients are loaded and the program is selected, it’s time to start the machine․ Ensure the baking pan is securely placed inside the machine․ Press the START button to begin the baking process․ The machine will confirm with a beep and start operating according to the selected program․ If you prefer delayed baking, use the TIMER key to set the desired start time, then press START․ The machine will automatically begin at the set time․ Always ensure the lid is closed properly before starting․ The machine will handle mixing, kneading, rising, and baking․ Let it run uninterrupted for optimal results․ Avoid opening the lid during operation to maintain consistent temperatures․ Your fresh bread will be ready once the cycle completes․

Customizing Your Bread Recipes
Customize your bread recipes by adjusting ingredients, adding mix-ins, or experimenting with different settings․ This flexibility allows you to create unique flavors and textures tailored to your preference․
6․1 Adjusting Ingredients for Different Loaf Sizes
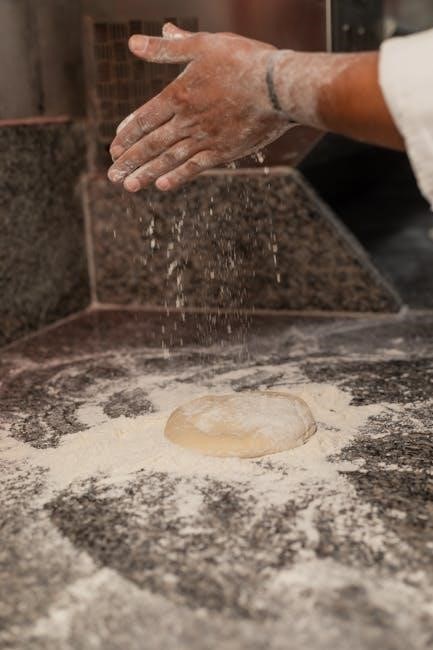
Adjusting ingredients for different loaf sizes is essential for achieving the perfect bread texture․ For smaller loaves (1 lb․), use 2 cups of flour, 1 teaspoon of salt, and 1 teaspoon of sugar․ For larger loaves (1․5 lb․), increase flour to 3 cups and adjust yeast and liquids accordingly․ Extra-large loaves (2 lb․) require 4 cups of flour and proportional increases in other ingredients․ Always check the manual for specific ratios to ensure proper dough consistency․ Using a digital scale can help maintain accuracy․ Remember, ingredient proportions must align with the selected loaf size for optimal results․ Experiment cautiously to avoid over- or under-proofing the dough․
6․2 Understanding the Delay Start Feature
The delay start feature on your Welbilt Bread Machine allows you to set a timer for baking up to 13 hours in advance․ This is perfect for waking up to freshly baked bread or having it ready for dinner․ To use this feature, press the TIMER key, select your desired delay time, and confirm with the START button․ Ensure all ingredients are properly measured and loaded into the baking pan before setting the timer․ The machine will automatically begin the baking process at the specified time․ This feature adds convenience, enabling you to plan your baking schedule effortlessly․ Always double-check the timer settings before leaving the machine unattended․
6․3 Adding Special Ingredients or Mix-ins
Enhance your bread with special ingredients like nuts, seeds, herbs, or dried fruits․ Add mix-ins directly to the baking pan before starting the machine․ For optimal distribution, add ingredients during the dough cycle or use the machine’s designated pause feature․ Popular choices include garlic, cheese, or cinnamon for unique flavors․ Ensure ingredients are evenly spread to avoid clumping․ For delayed baking, refrigerate perishable mix-ins until ready to bake․ Experiment with combinations to create personalized recipes․ This feature makes the Welbilt Bread Machine versatile for crafting custom breads that suit your taste preferences․ Always follow measurement guidelines to maintain proper dough consistency․ Happy experimenting!
Troubleshooting Common Issues
Address common issues like uneven baking or machine malfunctions by checking power connections and settings․ Ensure ingredients are measured correctly and the pan is properly aligned for consistent results․
Refer to the manual for specific error solutions and maintenance tips to keep your Welbilt Bread Machine functioning optimally․
Regular cleaning and proper dough handling can prevent many issues․
Consult troubleshooting guides for detailed fixes․
Happy baking! Always follow safety precautions․
Gather all information․
Perfect loaves guaranteed․
Enjoy baking!
Stay safe․
Maintain machine;
Enjoy fresh bread․
Fix issues easily․
Follow guidelines․
Ensure accuracy․
Prevent breakdowns․
Maintain performance․
Resolve problems quickly․
Keep baking!
Stay informed․
Use resources․
․
․
․
․
․
․
․
․
․
․
․
․
․
․
․
․
․
!
․
․
․
․
․
․
․
․
․
․
․
․
․
․
․
․
․
․
․
!
․
․
․
․
․
․
․
․
․
․
․
․
․
․
․
․
․
․
․
!
․
․
․
․
․
․
․
․
․
․
․
․
․
․
․
․
․
․
․
!
․
․
․
․
․
․
․
․
․
․
․
․
․
․
․
․
․
․
․
!
․
․
․
․
․
․
․
․
․
․
․
․
․
․
․
․
․
․
․
!
․
․
․
․
․
․
․
․
․
․
․
․
․
․
․
․
․
․
․
!
․
․
․
․
․
․
․
․
․
․
․
․
․
․
․
․
․
․
․
!
․
․
․
․
․
․
․
․
;
․
․
․
․
․
․
․
․
․
․
!
․
․
․
․
․
․
․
․
․
․
․
․
․
․
․
․
7․1 Common Errors and Solutions
Identify and resolve common issues with your Welbilt Bread Machine․ One frequent error is uneven baking, often caused by incorrect ingredient measurements or improper pan alignment․
Ensure the baking pan is securely locked and ingredients are loaded accurately․
If the machine stops during operation, check the power connection and ensure the lid is closed properly․
For dough that doesn’t rise, verify yeast freshness and temperature settings․
Excessive noise may indicate improper placement or overload; adjust positioning and reduce load size․
Refer to the manual for specific error codes and solutions․ Regular cleaning and proper maintenance can prevent many issues․
Consult troubleshooting guides for detailed fixes․
Addressing these common errors ensures optimal performance and perfect loaves every time․
7․2 Dealing with Undercooked or Overcooked Bread
If your bread is undercooked, check the baking temperature and ensure the timer is set correctly․
Overcooked bread may result from high heat settings or selecting the wrong crust color․
To resolve these issues, adjust the temperature and baking time according to the machine’s manual․
For undercooked bread, restart the machine with an extended baking cycle․
For overcooked bread, reduce the crust color setting or shorten the baking time․
Always monitor the bread during the final stages of baking to achieve the perfect texture and color․
Regularly clean the machine and ensure proper ingredient measurements to prevent such issues․
Consult the troubleshooting section in the manual for model-specific guidance․
By adjusting settings and monitoring closely, you can achieve perfectly baked bread every time․
Maintenance and Cleaning
Regularly clean the Welbilt Bread Machine with a damp cloth to remove dough residue․
Avoid harsh chemicals to protect the finish․
Clean the baking pan with warm, soapy water after each use․
Dry thoroughly to prevent rust․
Lubricate moving parts as needed for smooth operation․
Always unplug the machine before cleaning for safety․
8․1 Regular Cleaning of the Machine
Regular cleaning is essential to maintain your Welbilt Bread Machine’s performance and longevity․
Always unplug the machine before cleaning to ensure safety․
Wipe the exterior with a damp cloth, avoiding harsh chemicals or abrasive cleaners․
For the interior, remove any leftover dough or crumbs using a soft brush or damp cloth․
Never submerge the machine in water or use excessive moisture, as it may damage electrical components․
After each use, clean the baking pan and accessories with warm, soapy water․
Rinse thoroughly and dry to prevent rust or bacterial growth․
Regularly inspect and clean the machine’s crevices to remove trapped dough particles․
This routine will keep your machine in excellent condition for consistent bread-making results․
Cleaning after every use ensures optimal performance and prevents mold buildup․
Always refer to the manual for specific cleaning recommendations tailored to your model․
8․2 Maintaining the Baking Pan
Maintaining the baking pan is crucial for optimal performance and longevity․
Always wash the pan with warm, soapy water after each use, scrubbing gently to remove dough residue․
Avoid using abrasive cleaners or scourers, as they may damage the non-stick coating․
Never submerge the pan in water or expose it to extreme temperatures․
After cleaning, dry the pan thoroughly to prevent rust or water spots․
For stubborn stains, mix baking soda and water to create a paste, and let it sit before rinsing․
Regularly inspect the pan for signs of wear and tear․
If the non-stick coating becomes damaged, consider replacing the pan to ensure consistent bread quality․
Proper care will extend the life of your baking pan and maintain your machine’s efficiency․
Advanced Features of the Welbilt Bread Machine
Discover advanced features like delayed baking, crust color control, and customizable settings for ultimate flexibility․
These innovations allow you to tailor bread-making to your preferences, ensuring perfect results every time․
The timer and auto-eject system enhance convenience, while various bread settings cater to diverse recipes and textures․
Explore these features to elevate your bread-making experience․
9․1 Using the Timer for Delayed Baking
The Welbilt Bread Machine offers a convenient delayed baking feature, allowing you to set a timer up to 13 hours in advance․
This feature is perfect for busy schedules, ensuring freshly baked bread is ready when you need it․
To use the timer, simply press the TIMER key and select your desired delay time․
Once set, press the START button, and the machine will automatically begin the bread-making process at the designated time․
This feature is ideal for waking up to the aroma of freshly baked bread or having a loaf ready for dinner․
It’s a great way to save time while enjoying homemade bread at your convenience․
9․2 Understanding the Different Bread Settings
The Welbilt Bread Machine offers a variety of bread settings to cater to different preferences and recipe requirements․
Settings include options for basic bread, whole grain, French bread, and gluten-free, ensuring versatility for all bakers․
Each setting is designed to optimize baking time and temperature for the best results․
Additionally, the machine features crust color options, allowing you to choose between a light or dark crust․
The MANUAL CYCLE is ideal for preparing dough for rolls, pizza, or other specialty breads․
By understanding these settings, you can customize your bread-making experience and achieve consistent, delicious results every time․
Mastering your Welbilt Bread Machine opens doors to endless baking possibilities․
By following these guidelines, you’ll create delicious bread effortlessly․
Experiment with recipes and explore advanced features for a customizable experience․
Happy baking!
10․1 Summary of Key Instructions
For optimal use of your Welbilt Bread Machine, always start by reading the instruction manual carefully․
Ensure proper safety precautions, such as avoiding direct ingredient pouring into the machine․
Understand the control panel features and baking pan setup before first use․
Load ingredients in the correct order and select the appropriate program for your bread type․
Utilize the delay start feature for convenience and ensure the machine is placed on a heat-resistant surface․
Regularly clean and maintain the machine to prolong its lifespan․
Experiment with recipes and settings to achieve your desired bread texture and flavor․
By following these guidelines, you’ll enjoy consistent, delicious results from your Welbilt Bread Machine․
10․2 Encouragement to Experiment with Recipes
Embrace the joy of baking with your Welbilt Bread Machine by experimenting with diverse recipes and ingredients!
From classic white bread to hearty whole-grain loaves, the machine’s versatility allows you to explore endless possibilities․
Try incorporating herbs, nuts, or spices for unique flavors, or create gluten-free options for special dietary needs․
Don’t hesitate to adjust ingredient ratios or explore new programs like the delay start feature․
Remember, baking is an art that evolves with practice, so don’t be afraid to innovate․
With each loaf, you’ll refine your skills and discover your favorite recipes․
Enjoy the process and the satisfaction of creating fresh, homemade bread tailored to your taste preferences!