Kings Plug and Play Wiring Harness Manual: Article Plan
This comprehensive guide details installation, troubleshooting, and advanced configurations for Kings wiring harnesses,
leveraging user feedback from platforms like 4WD Supacentre and Nissan Patrol forums.
Kings Plug and Play wiring harnesses have rapidly become a popular choice for 4WD enthusiasts seeking a streamlined and efficient solution for auxiliary lighting installations. This guide provides a detailed walkthrough, covering everything from understanding the harness components to advanced wiring configurations. We’ll address common issues reported by users on platforms like 4WD Supacentre’s Trustpilot reviews, specifically regarding wire length and connector compatibility.
Many users, as highlighted in Toyota Prado forum discussions, opt for Kings harnesses due to their cost-effectiveness – often cheaper than purchasing lights separately – and the ease of installation they offer. This manual aims to demystify the process, ensuring a successful installation whether you’re a seasoned mechanic or a first-time installer. We will also explore options like Repco switch compatibility and bypassing the high beam trigger, catering to diverse user needs and preferences.
What is a Kings Plug and Play Wiring Harness?
A Kings Plug and Play wiring harness is a pre-assembled wiring system designed to simplify the installation of auxiliary lights, such as LED bars and spotlights, on vehicles. Unlike traditional wiring methods requiring individual connections and soldering, these harnesses utilize Deutsch connectors for quick and secure connections. This “plug and play” functionality significantly reduces installation time and complexity, appealing to both DIY enthusiasts and professional installers.
The harness typically includes a relay box, essential for protecting the vehicle’s electrical system, and pre-wired connections for the battery, switch, and lights. User reviews from 4WD Supacentre emphasize the harness’s usefulness, particularly when replacing lights with different connector types. It acts as a central hub, streamlining the wiring process and minimizing the risk of electrical errors, as noted in discussions on Nissan Patrol forums.
Benefits of Using a Kings Wiring Harness
Kings wiring harnesses offer several key advantages over traditional wiring methods. Primarily, they drastically reduce installation time, making them “easy DIY” projects, as highlighted in 4WD Supacentre reviews. The pre-wired system eliminates the need for cutting, splicing, and soldering, minimizing potential errors and ensuring a cleaner installation.
Furthermore, the inclusion of a relay box protects the vehicle’s factory wiring from overloads, enhancing safety and reliability. The Deutsch connectors provide secure, weatherproof connections, crucial for off-road environments. Users appreciate the convenience, especially when upgrading lights, as the harness often proves cheaper than purchasing lights and wiring separately. The harness also simplifies troubleshooting, allowing for easy testing of individual components, as suggested in Patrol 4×4 forum discussions.
Understanding the Components
A Kings Plug and Play wiring harness comprises several essential components working in unison. The core is the pre-wired harness itself, featuring high-quality wiring and robust connectors. A key element is the relay box, responsible for managing power distribution and protecting the vehicle’s electrical system.
Deutsch connectors are integral, providing secure and weatherproof connections for lights and other accessories. These connectors are designed for durability in harsh conditions. The harness also includes wiring for connecting to the battery (positive and negative) and a switch for controlling the lights. Understanding the function of each wire – typically blue, black, and white – is crucial for proper installation, as noted in discussions regarding switch upgrades and compatibility with Repco switches.
Harness Overview: Wires and Connectors
The Kings Plug and Play harness utilizes a color-coded wiring system for simplified installation. Typically, the harness features wires for positive and negative battery connection, a relay trigger, and a high beam trigger (often bypassed for independent operation). The connectors are predominantly Deutsch style, known for their waterproof and durable nature, essential for off-road applications.

Understanding wire functions is paramount. The positive wire delivers power from the battery, while the negative completes the circuit. The relay trigger activates the relay, allowing the lights to draw power directly from the battery. User feedback highlights potential issues with wire length, sometimes necessitating extensions for optimal battery placement. Correctly identifying and connecting these wires ensures proper functionality and prevents electrical issues.
Deutsch Connectors: Function and Identification
Kings harnesses prominently feature Deutsch connectors, prized for their reliability and weatherproofing. These connectors create a secure, watertight seal, crucial for resisting corrosion and ensuring consistent performance in harsh environments. Identifying the correct pins within the Deutsch connector is vital for proper wiring.
Deutsch connectors utilize a pin and socket system; ensure correct alignment during connection. Typically, the harness will have pre-terminated Deutsch connectors for easy integration with compatible lights. If adapting to lights with different connectors, proper crimping tools and pins are required. User reviews emphasize the benefit of these connectors, simplifying installation compared to traditional wiring methods, and reducing the risk of electrical faults due to moisture.
Relay Box: Purpose and Location
The Kings Plug and Play harness incorporates a relay box, a critical component for safely managing high-current draw from the lights. Relays act as electrically operated switches, allowing a low-current signal from the switch to control a high-current circuit to the lights, protecting the vehicle’s factory wiring. This prevents overloading circuits and potential damage.
The relay box is typically located inline on the harness, often near the battery connection point. It houses the relays necessary for switching the lights on and off. Proper mounting of the relay box is essential, securing it away from heat sources and potential damage. Understanding the relay box’s function is key to troubleshooting any issues with light operation, ensuring a safe and reliable setup.
Installation Guide
Installing a Kings Plug and Play wiring harness is designed to be a straightforward DIY project, minimizing the need for professional installation. However, careful attention to detail and adherence to safety precautions are paramount; This guide outlines the key steps, beginning with pre-installation checks to ensure you have the necessary tools and understand the wiring diagram.
The process involves connecting the harness to the vehicle’s battery (positive and negative terminals), wiring it to a suitable switch, and finally, connecting the lights. Ensuring correct polarity during light connection is crucial to prevent damage. The harness simplifies this process with Deutsch connectors, but understanding their function is vital. Following each step methodically will result in a clean, functional, and safe lighting setup.
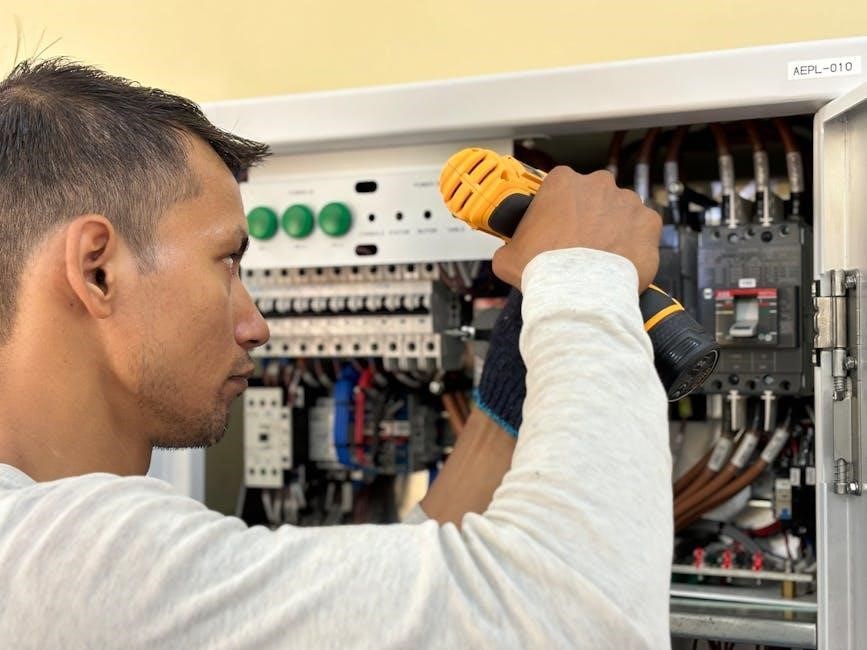
Pre-Installation Checks: Tools and Safety
Before commencing installation, prioritize safety and preparation. Disconnect the vehicle’s negative battery terminal to prevent short circuits. Gather essential tools: wire strippers, crimpers, a multimeter for testing continuity, and potentially heat shrink tubing for added protection. Inspect the Kings wiring harness for any visible damage before proceeding.
Familiarize yourself with the wiring diagram included with the harness, paying close attention to wire colors and connector types. Ensure the chosen mounting location for the relay box is dry and accessible. Wear appropriate safety glasses and gloves during the installation process. Double-check all connections before reconnecting the battery, minimizing the risk of electrical issues or damage to the vehicle’s electrical system.
Connecting to the Battery: Positive and Negative
Carefully connect the harness’s positive (red) and negative (black) wires to the vehicle’s battery. Utilize appropriately sized crimp connectors and ensure a secure, corrosion-resistant connection. Some users note the factory wiring may require extension, so have extra wire and connectors available. A fuse should be installed as close to the battery as possible on the positive wire for circuit protection.
Double-check polarity before final connection – reversing polarity can cause significant damage to the harness and vehicle’s electrical system. Secure the wires to prevent strain on the battery terminals. Consider using a battery terminal protector to prevent corrosion. After connecting, verify the connection with a multimeter to confirm proper voltage and continuity.
Wiring to the Switch: Identifying the Correct Wires
The Kings harness typically features a three-wire switch connection: blue, black, and white. Identifying these correctly is crucial for proper operation. The blue wire generally serves as the switch input, triggering the relay. Black is typically ground, and white often provides power to illuminate the switch.
When upgrading to a Repco switch, careful attention to the wiring diagram is essential. Users have sought guidance on matching the Kings wiring to the Repco terminals. Ensure a secure connection to each terminal, avoiding loose wires. Test the switch functionality after wiring, before fully securing it in the vehicle. Incorrect wiring can prevent the lights from operating or cause a short circuit.
Connecting the Lights: Ensuring Polarity
Correct polarity is vital when connecting your lights to the Kings harness. LED lights are polarity sensitive; reversing the connection can prevent them from illuminating or even damage them. Typically, the red wire from the harness connects to the positive (+) terminal of the light, and the black wire connects to the negative (-) terminal.
Double-check the light manufacturer’s specifications to confirm the polarity. Some harnesses utilize Deutsch connectors, simplifying the connection process, but polarity still needs verification. Customer feedback highlights instances where lights didn’t match existing wiring, necessitating adapter cables. A quick test – briefly connecting the lights – can confirm proper polarity before final installation.
Switch Integration
The Kings harness simplifies switch integration for controlling your lights. The harness typically features a dedicated wire for connecting to a switch, allowing for convenient on/off functionality. Users upgrading switches, like those seeking Repco alternatives, need to carefully match wiring configurations. The original Kings switch utilizes blue, black, and white wires – understanding their function is crucial for a successful swap.
Proper switch wiring ensures safe and reliable operation. Incorrect connections can lead to blown fuses or damage to the harness. Many users find the harness easy to integrate, requiring only a few wire connections to the battery, relay, and switch. Bypassing the high beam trigger is also possible, offering independent light control.
Kings Switch Wiring Diagram: Blue, Black, and White Wires
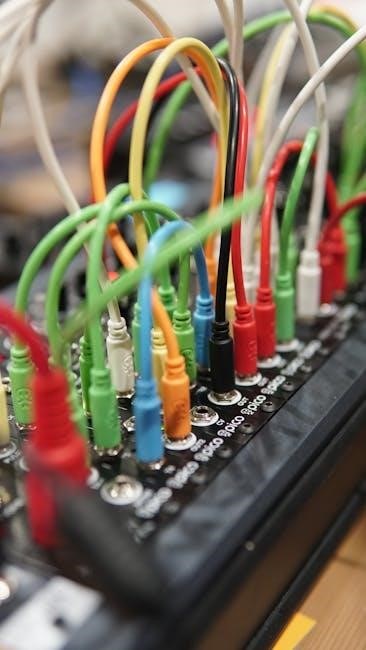
Understanding the Kings switch wiring – blue, black, and white wires – is vital for correct operation and modifications. The blue wire generally serves as the switched positive, delivering power to the lights when the switch is activated. The black wire is typically the ground, completing the circuit. The white wire often connects to the high beam trigger, enabling synchronization with the vehicle’s high beams.
When replacing the switch, accurately identifying these wires is paramount. Incorrectly connecting them can cause the lights to malfunction or create a short circuit. Referencing the Kings operating manual (PDF) is highly recommended. Users swapping to a Repco switch must create a corresponding wiring diagram, ensuring each wire’s function is maintained for seamless integration.
Repco Switch Compatibility and Wiring
Adapting a Repco switch to a Kings wiring harness requires careful attention to wire matching, as the terminals may not directly correspond. Users have inquired about compatibility, seeking guidance on connecting the Repco switch’s terminals to the Kings harness’s blue, black, and white wires. A custom wiring diagram is essential for a successful conversion.
Typically, the Repco switch will have terminals for power input, switched output, and ground. Match the Kings blue wire to the Repco switch’s output terminal, the black wire to ground, and carefully consider the white wire’s function – often the high beam trigger – ensuring it connects to the appropriate Repco terminal if high beam synchronization is desired. Double-check all connections before powering up the system.
Bypassing the High Beam Trigger
For users wanting independent LED bar control, bypassing the high beam trigger is a common modification. The Kings harness typically includes a wire designated to activate the lights in conjunction with the vehicle’s high beams. To disable this functionality, the white wire – often the high beam trigger – must be isolated.
This can be achieved by cutting the white wire and capping off both ends with weatherproof connectors, preventing the signal from reaching the relay. Alternatively, connect the white wire to a constant 12V source, effectively overriding the high beam input. Ensure proper insulation and secure connections to avoid shorts. Testing the setup thoroughly is crucial to confirm independent operation before final installation.
Troubleshooting
Common issues during Kings harness installation often stem from wiring errors or insufficient power. If lights fail to illuminate, first verify the battery connections – positive and negative – are secure and have adequate voltage. Check the fuse within the relay box; a blown fuse is a frequent culprit.

Inspect all Deutsch connectors for proper seating and corrosion. Ensure correct wire polarity when connecting lights; reversed polarity can damage LEDs. Harness length limitations can cause strain on connections, so extending wires correctly is vital. If using a Repco switch, double-check wiring against the diagram. Finally, consult user feedback on platforms like Trustpilot for shared solutions to common installation hurdles.
Common Installation Issues and Solutions
A frequent problem reported by users is incompatible light plug types, necessitating the Kings harness as a solution. Insufficient wire length for battery connection is another common complaint; extending wires with appropriate connectors resolves this. Difficulty identifying the correct wires for switch integration, particularly with aftermarket switches like Repco models, can occur – careful diagram comparison is key.
Issues with the high beam trigger are also noted; bypassing this feature requires specific wiring adjustments. Troubleshooting often involves verifying fuse integrity within the relay box and ensuring secure Deutsch connector connections. Always double-check polarity when connecting lights to avoid damage. Referencing online forums like Nissan Patrol 4×4 can provide valuable peer-to-peer solutions.
Harness Length Limitations: Extending Wires
A recurring issue highlighted in user reviews is the limited length of the positive and negative wires, particularly when installing lights further from the battery. Extending these wires is often necessary, requiring careful attention to detail. Use appropriately sized, weatherproof connectors – solder and heat shrink tubing are recommended for a secure, reliable connection.
Ensure the extended wire gauge matches or exceeds the original harness wiring to prevent voltage drop and overheating. Avoid simply twisting and taping wires, as this creates a safety hazard. When extending the high beam trigger wire, maintain proper insulation to prevent shorts. Consider the total wire run length to minimize resistance and ensure optimal performance.
Identifying and Fixing Wiring Errors
Incorrect wiring is a common source of issues, often manifesting as lights not functioning or erratic behavior. Begin by meticulously re-checking all connections against the Kings wiring diagram and any relevant Repco switch wiring information. Pay close attention to polarity – reversed connections can damage LEDs. Inspect Deutsch connectors for secure locking and proper pin alignment.
If lights don’t illuminate, verify battery connection, fuse integrity, and switch functionality. Use a multimeter to test for voltage at key points in the harness. A lack of voltage indicates a break or poor connection. Carefully examine wire insulation for damage or exposed conductors. Address any shorts immediately to prevent further complications and potential fire hazards.
Advanced Configurations
The Kings harness serves as a robust foundation for customized lighting setups beyond simple plug-and-play installations. Users can wire LED bars independently of the high beam trigger, requiring disconnection of the high beam wire and direct connection to a switched power source. This provides constant illumination without relying on headlight activation.
The harness’s versatility extends to various light types, though compatibility should be verified. It can be adapted to control multiple light bars using additional relays and switches, expanding functionality. Experienced users can leverage the harness as a central wiring hub, integrating auxiliary accessories like air compressors or USB chargers. Always prioritize safety and proper fusing when undertaking complex modifications.

Wiring LED Bars Without High Beam Activation
Many users desire independent control of their LED bars, bypassing the factory high beam trigger. This is achievable by disconnecting the high beam switching wire within the Kings harness. Instead of connecting this wire, it should be capped and insulated to prevent shorts.
Subsequently, connect this wire to a dedicated switched power source, such as an ignition-activated accessory wire. This ensures the LED bars illuminate only when the vehicle’s ignition is on, providing consistent lighting. Testing the connection is crucial before final installation. Remember to consult wiring diagrams and prioritize safety when modifying the harness. This configuration offers greater control and avoids unwanted activation with high beams.
Using the Harness with Different Light Types
The Kings Plug and Play harness demonstrates versatility, accommodating various light types beyond those initially supplied. However, compatibility hinges on connector types; the Deutsch connectors are key. If your lights utilize different connectors, adapters may be necessary for a secure connection.
Ensure the light’s voltage and wattage align with the harness’s specifications to prevent overload. Polarity is also critical; incorrect wiring can damage the lights or the harness. Carefully identify the positive and negative wires on both the harness and the lights. Consider the current draw of the lights when selecting a fuse rating for the harness. Proper adaptation ensures safe and reliable operation with diverse lighting solutions.
Harness as a Base for Custom Wiring
The Kings harness excels as a foundational element for more complex custom wiring projects. Its pre-wired Deutsch connectors and relay box significantly reduce installation time and complexity. Users can tap into existing wires to power additional accessories, such as air compressors or auxiliary switches.
The relay box provides a centralized point for managing power distribution, enhancing safety and organization. Careful planning and proper fuse selection are crucial when adding custom circuits. Always consult wiring diagrams and ensure compatibility with the harness’s specifications. This approach allows for a tailored setup, expanding functionality beyond basic lighting control, while leveraging the harness’s robust construction and reliable connections.
Resources and Support
Kings offers comprehensive documentation to assist with installation and troubleshooting. Access the official Kings Operating Manual (PDF) and Installation Manual (PDF) through their website for detailed instructions and wiring diagrams. Furthermore, the 4WD Supacentre platform, particularly Trustpilot reviews, provides valuable insights from fellow users regarding real-world experiences and potential challenges.
Online forums, such as Nissan Patrol 4×4, host discussions and solutions to common installation issues. These communities offer a space to ask questions, share tips, and learn from others’ successes. Direct support can also be obtained through Kings’ customer service channels, ensuring assistance is readily available when needed. Utilizing these resources maximizes the benefits of the harness.

Kings Operating Manual (PDF)
The Kings Operating Manual (PDF) serves as the primary reference for understanding the full capabilities of the plug and play wiring harness. This document details the harness’s specifications, including maximum amperage ratings, supported light types, and safety precautions; It provides a comprehensive overview of the system’s functionality, explaining how each component interacts to deliver power and control to your lights.
Users will find detailed explanations of the Deutsch connectors, relay box operation, and switch integration. The manual also outlines proper usage guidelines to ensure longevity and prevent damage to the harness. It’s crucial to review this document before beginning installation to familiarize yourself with the system and avoid potential issues. Accessing the PDF is essential for safe and effective operation.
Kings Installation Manual (PDF)
The Kings Installation Manual (PDF) is a step-by-step guide designed to simplify the wiring process for their plug and play harnesses. It provides clear, concise instructions accompanied by detailed diagrams, ensuring even novice users can successfully install the system. The manual begins with a pre-installation checklist, outlining necessary tools and crucial safety precautions.
It then walks you through each connection – battery, switch, and lights – emphasizing correct polarity and wire identification. Specific attention is given to the relay box and its function within the circuit. Troubleshooting tips are included to address common installation hurdles. This PDF is invaluable for a smooth, error-free installation, maximizing the harness’s benefits and ensuring optimal performance.
Customer Reviews and Feedback (4WD Supacentre ‒ Trustpilot)
Customer feedback on the Kings Plug and Play Wiring Harness, sourced from 4WD Supacentre and Trustpilot, is overwhelmingly positive, highlighting its ease of installation and usefulness. Many users report the harness was cheaper than purchasing lights separately, offering significant value. A common theme is the simplification of wiring, particularly when upgrading existing lights with different connector types.
Reviewers praise the Deutsch plugs for quick and secure connections. However, some mention the need for longer positive and negative wires for optimal battery connection. Overall, the harness is consistently described as “excellent” and a time-saver, making DIY spotlight installation accessible to a wider range of users. The harness is a valuable addition to any 4WD setup.